'87 Shelby CSX
#321 of 750

davidr at shelbycsx.com

The Dan Culkin Anti-Lag Valve ("D-valve")
The "D-valve" is an idea of Dan Culkin's in which a check valve is teed into the upper intercooler hose to allow air to be drawn in more easily when the system is in vacuum, bypassing the turbo and intercooler. This results in much quicker throttle response and spool-up. Once any boost is produced, the valve immediately closes.
|
|
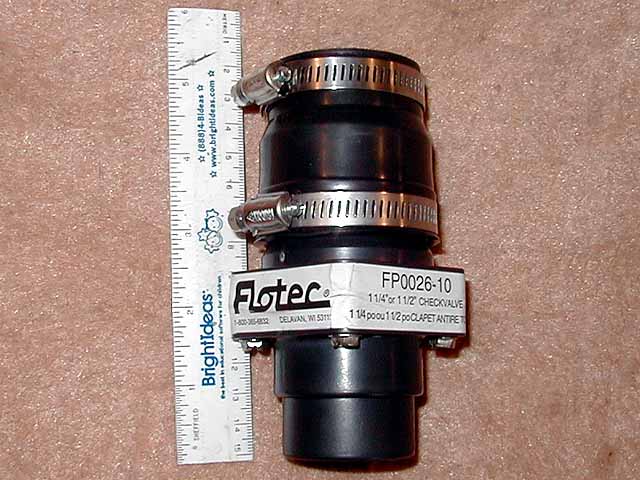
I bought a check valve at Home Depot in the plumbing department for $8.98. There are several styles and brands of check valves available. The one I got, the Flotec FP0026-10, is a "flapper" type valve. It comes with a rubber connector that can be used to attach it to a 1.5" pipe.
|
|
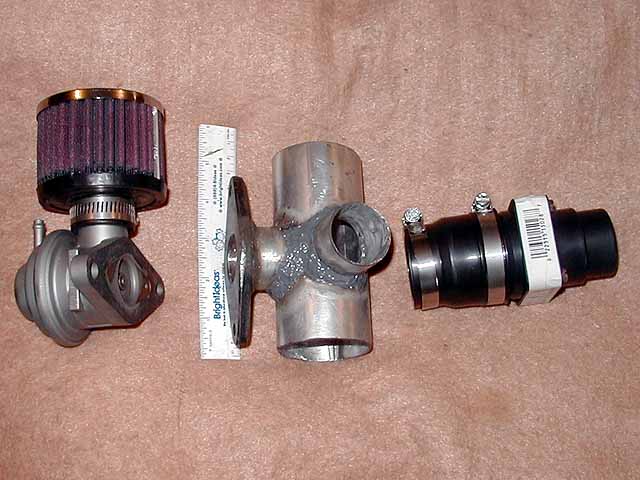
To install the D-valve, I added another 1.5" connection to my 1G Talon BOV flange and pipe. This assembly takes the place of the flexible upper intercooler hose between the intercooler and the air filter box. (I'm using a drop-in K&N filter, so I still have the air filter box.) Note that with the orientations of the BOV flange and the new 1.5" connection, the BOV filter and the D-valve both point the same direction. This arrangement fits nicely in the space next to the battery, between the radiator fan and the air filter box. The D-valve must be filtered, because air will be drawn through it directly into the throttle body. K&N part number RC-0880 should fit on the Flotec valve.
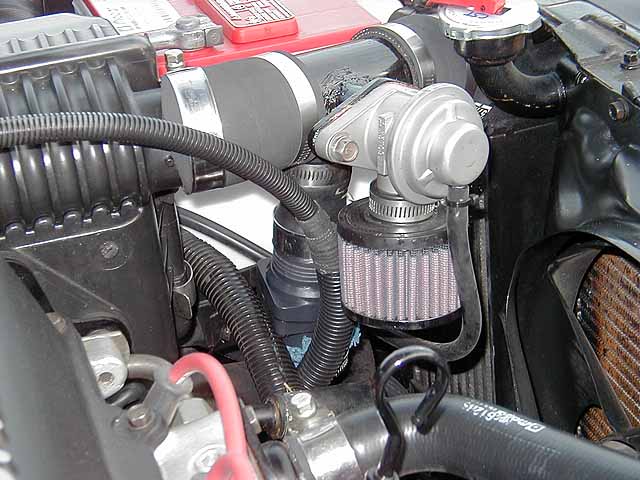
 Here
are a couple of pictures of my current installation. I still don't have the
K&N filter on there yet.
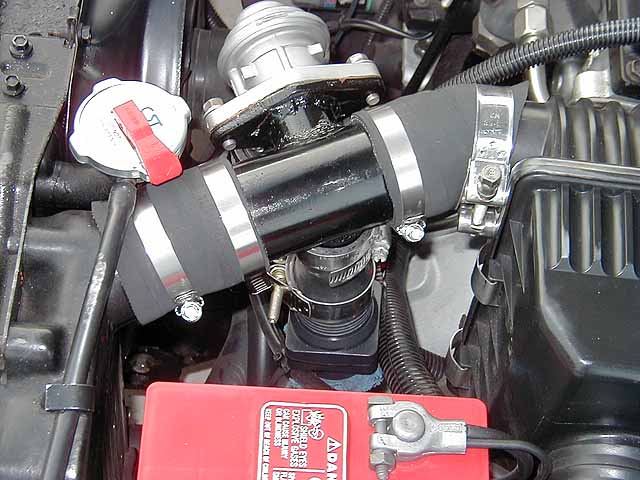
Here
are a couple of pictures of my current installation. I still don't have the
K&N filter on there yet.
UPDATE 10-29-01 -- On the first day after installing the D-valve, it popped out of it's rubber connector at 17 p.s.i. I used a Dremel tool to make some grooves around the circumference, and clamped it back on more tightly. So far, so good.
UPDATE 11-02-01 -- Wow! You've really got to clamp this thing on! Yesterday I blew the other end of the connector off of the pipe. Now I've replaced the rubber connector pictured above with a piece of an old lower radiator hose, and it's clamped on both ends really tight. Now I think it's going to stay on there.