
'87 Shelby CSX
#321 of 750

davidr at shelbycsx.com

Using An '87 TI Wastegate Actuator With An '87 TII Turbo
As many Chrysler turbo enthusiasts are aware, the wastegate actuator used on TII engines from '86 to '88 has a weak spring that will not allow more than 14 to 15 p.s.i. of boost. At that point the exhaust simply pushes the wastegate open. In '89 Chrysler switched to a larger can with a stiffer spring. However, the pre-'89 TI actuator is also a larger can with a stiff spring. I already had one of these on hand, so I set about trying to adapt it for use on a TII turbo.
|
|
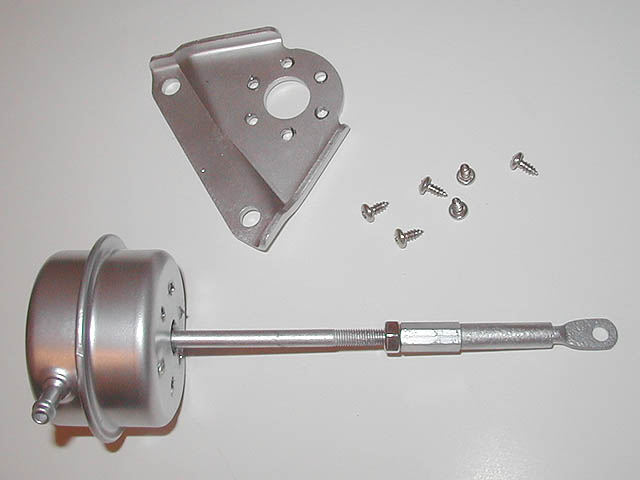
The can is attached to a bracket that holds it to the compressor housing. Unfortunately, the TI and TII brackets are different, so the cans must be removed from their brackets. The TI can also has a shorter arm than the TII version, so you need a way to lengthen it.
The cans are spot welded to the brackets, so you must carefully drill out the welds. This leaves you with a TII bracket with six holes surrounding the central hole through which the arm extends. Position the TI can on the TII bracket, and mark the positions of the six holes with a pencil or marker. Use a small drill bit (1/16" works well) to drill holes at the marks. This can be tricky because of the rough surface that is likely to be left from drilling out the welds. Be careful not to let metal shavings get into the can.
|
|
Next, use six short, fat stainless steel sheet metal screws to attach the can to the bracket. I found 3/8" #8 stainless steel screws at Elliot's, a good local hardware store. Neither Lowe's nor Home Depot had them. My main concern about attaching the can this way was that the screws might stick far enough into the can to puncture the diaphragm. When I drilled the starter holes for the screws, however, I discovered that there is a metal plate (the spring seat) under the holes, and the screws simply push slightly against that, making the spring that much stiffer.
|
|
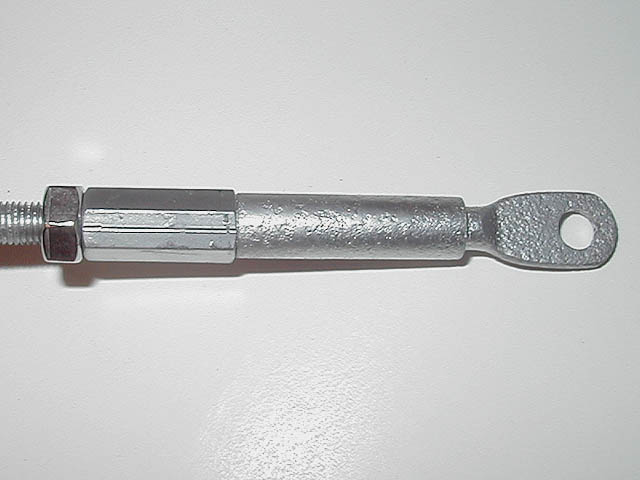
Finally, to lengthen the arm you need a coupling nut, a regular nut, and a threaded section of bolt at least an inch long. Ideally they should also be stainless steel. These are all a fine-threaded metric size, and finding them can be a challenge. I finally found them, again at Elliot's. (The coupling nut, however, was not available in stainless steel.) Join the coupling nut and original end of the arm with the section of bolt. Screw the regular nut onto the original arm to use as a lock nut, and follow it with the coupling nut assembly. Now you can adjust the arm to the length required and lock it there with the regular nut.
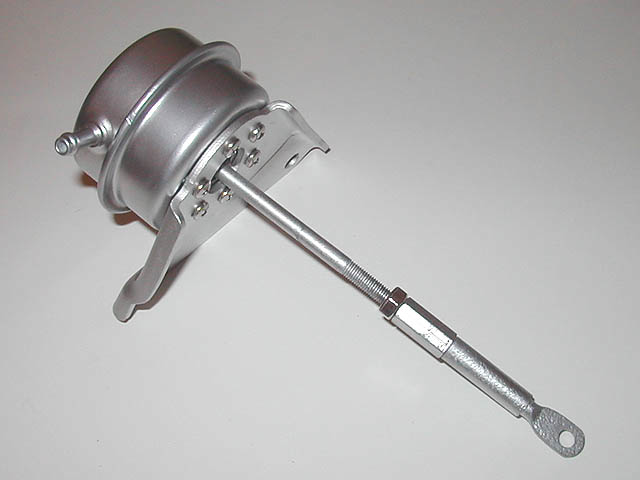
The result looks and works great.